Post by glorbes on Jun 6, 2006 22:23:25 GMT -5
Hey fellas.
Kevin and I had a chat about photographing customs a while back, and I kind of threw around some of the methods I use when I shoot my figures. Now, I'm not claiming to be Ansel Adams or anything, but I thought I'd share my set-up just in case you guys were curious...hopefully some of this is helpful.
My first rule is to never use a flash. Flashes tend to overwhelm what you are photographing, they cast wierd shadows, and tend to distort the subject.
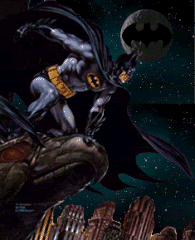
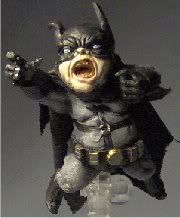
Boba with a flash:

The second rule is if you have various settings on your camera, switch it to the macro setting...this will yield the best results for custom photography.
The third rule is to have a neutral background...this way, the figure and its details are the focal point. Action shots are different...sometimes a themed background can bring a lot to a custom by placing it in an appropriate context, but for the main pics that are designed to showcase your work, use a clean, neutral colored background.
My set-up is a cardboard box lid that is propped up like so:

As you can see, I have two lamps on either side. These will provide the lighting for my custom instead of the flash.
Next, I drape a light blue or white bedsheet over the box lid like this:

This kind of set-up makes lighting much easier. In my case, I have articulated lamps that can be readjusted. Its best to have two different light sources...one that's set farther back, and one that can be placed closer to the figure. But, a regular lamp should suffice if the lampshade can be adjusted.
The fourth rule is to experiment with lighting. If one lamp position doesn't work, try another one until you find a good placement that lights the figure in a satisfactory manner.
Too dark:

Just right:

The proximity of the light can be important for creating moody effects...the closer the light is to the figure, the more intense the play between light and shadow becomes. Also, if you are going for a more dramatic effect, try lighting with one source as opposed to two sources.
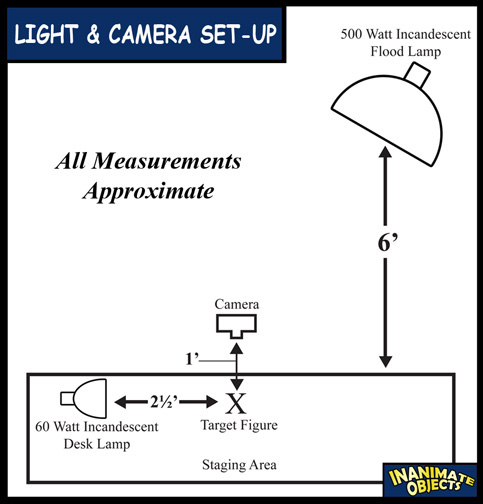
A typical amount of distance between figure and lamp for my pics:

A few other thoughts:
-Take a LOT of pics...and choose the best/clearest ones.
-Use a tripod...if you don't have one, try a stack of hardcover books on a solid chair.
-Experiment with different areas in your house...some places will be better for photography than others
-Use outdoor light if lamps won't work or are impractical...the sun is an excellent source of lighting that tends to work well with some (but not all) cameras.
Hope this is helpful/useful.
Kevin and I had a chat about photographing customs a while back, and I kind of threw around some of the methods I use when I shoot my figures. Now, I'm not claiming to be Ansel Adams or anything, but I thought I'd share my set-up just in case you guys were curious...hopefully some of this is helpful.
My first rule is to never use a flash. Flashes tend to overwhelm what you are photographing, they cast wierd shadows, and tend to distort the subject.
Boba with a flash:
The second rule is if you have various settings on your camera, switch it to the macro setting...this will yield the best results for custom photography.
The third rule is to have a neutral background...this way, the figure and its details are the focal point. Action shots are different...sometimes a themed background can bring a lot to a custom by placing it in an appropriate context, but for the main pics that are designed to showcase your work, use a clean, neutral colored background.
My set-up is a cardboard box lid that is propped up like so:
As you can see, I have two lamps on either side. These will provide the lighting for my custom instead of the flash.
Next, I drape a light blue or white bedsheet over the box lid like this:
This kind of set-up makes lighting much easier. In my case, I have articulated lamps that can be readjusted. Its best to have two different light sources...one that's set farther back, and one that can be placed closer to the figure. But, a regular lamp should suffice if the lampshade can be adjusted.
The fourth rule is to experiment with lighting. If one lamp position doesn't work, try another one until you find a good placement that lights the figure in a satisfactory manner.
Too dark:
Just right:
The proximity of the light can be important for creating moody effects...the closer the light is to the figure, the more intense the play between light and shadow becomes. Also, if you are going for a more dramatic effect, try lighting with one source as opposed to two sources.
A typical amount of distance between figure and lamp for my pics:
A few other thoughts:
-Take a LOT of pics...and choose the best/clearest ones.
-Use a tripod...if you don't have one, try a stack of hardcover books on a solid chair.
-Experiment with different areas in your house...some places will be better for photography than others
-Use outdoor light if lamps won't work or are impractical...the sun is an excellent source of lighting that tends to work well with some (but not all) cameras.
Hope this is helpful/useful.